Managing Shared Menus Across Multiple Locations in the FineDine Brand Dashboard
Updated: June 17, 2026
Step 1: Create a Brand and Access the Brand Dashboard
To start managing shared menus, first create a brand in your FineDine dashboard.
Click on your venue name and then select the Create Brand button.
This gives you access to the brand management dashboard, where you can manage a single shared menu across all your locations.
Step 2: Convert an Existing Menu into a Shared Menu
If you already have a menu created in your first branch, you can convert it into a shared menu.
Open your menu list, then click the More button to convert the existing menu into a shared menu.
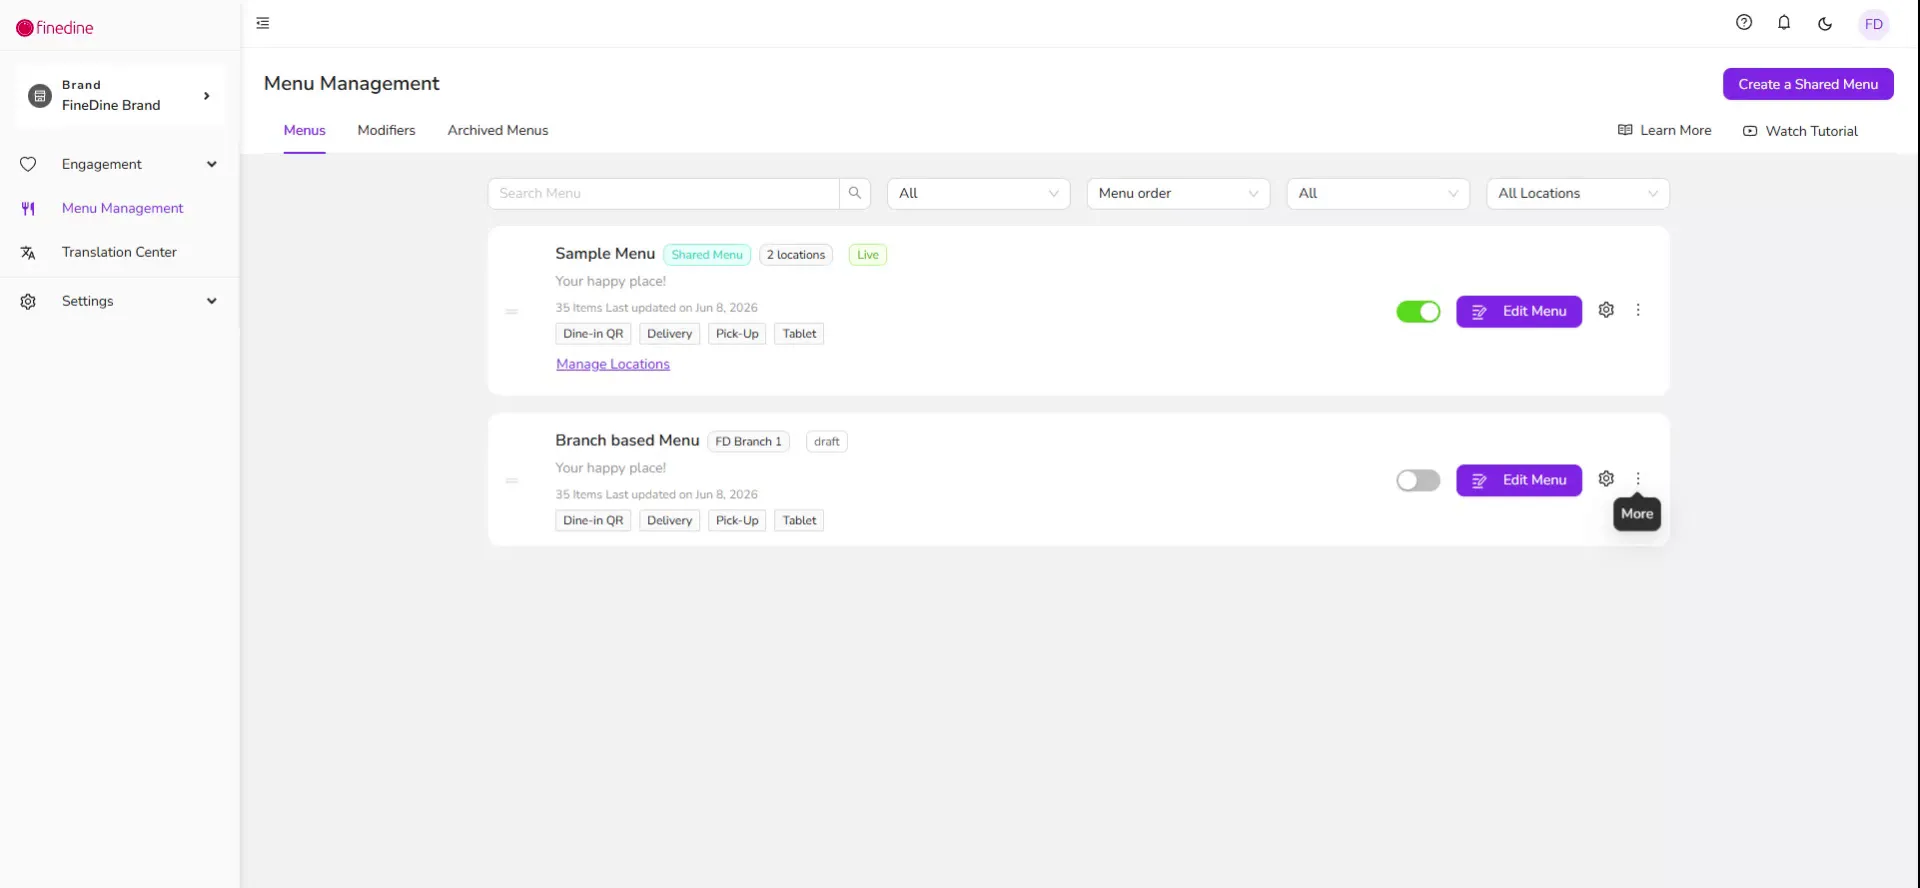
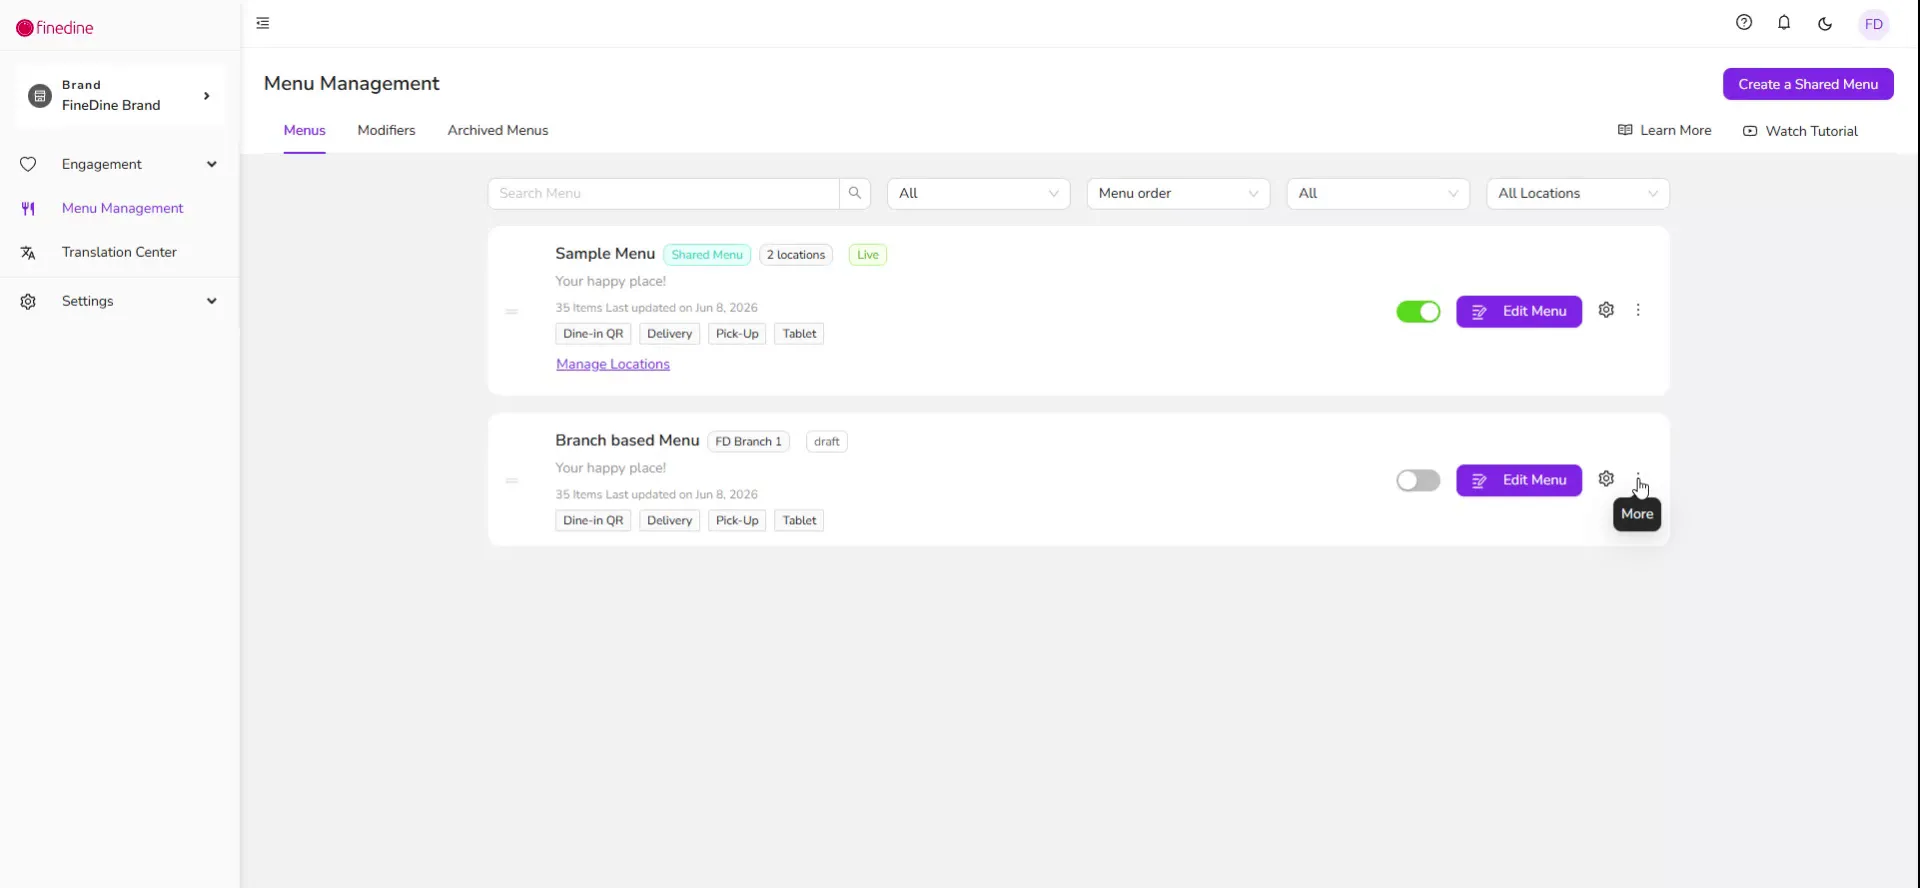
After conversion, you will see a Shared Menu tag next to the menu name, indicating it is now shared across locations.
Step 3: Select Locations for the Shared Menu
Next, manage the locations where this shared menu will be available.
Open the shared menu settings and choose the locations that should use this menu.
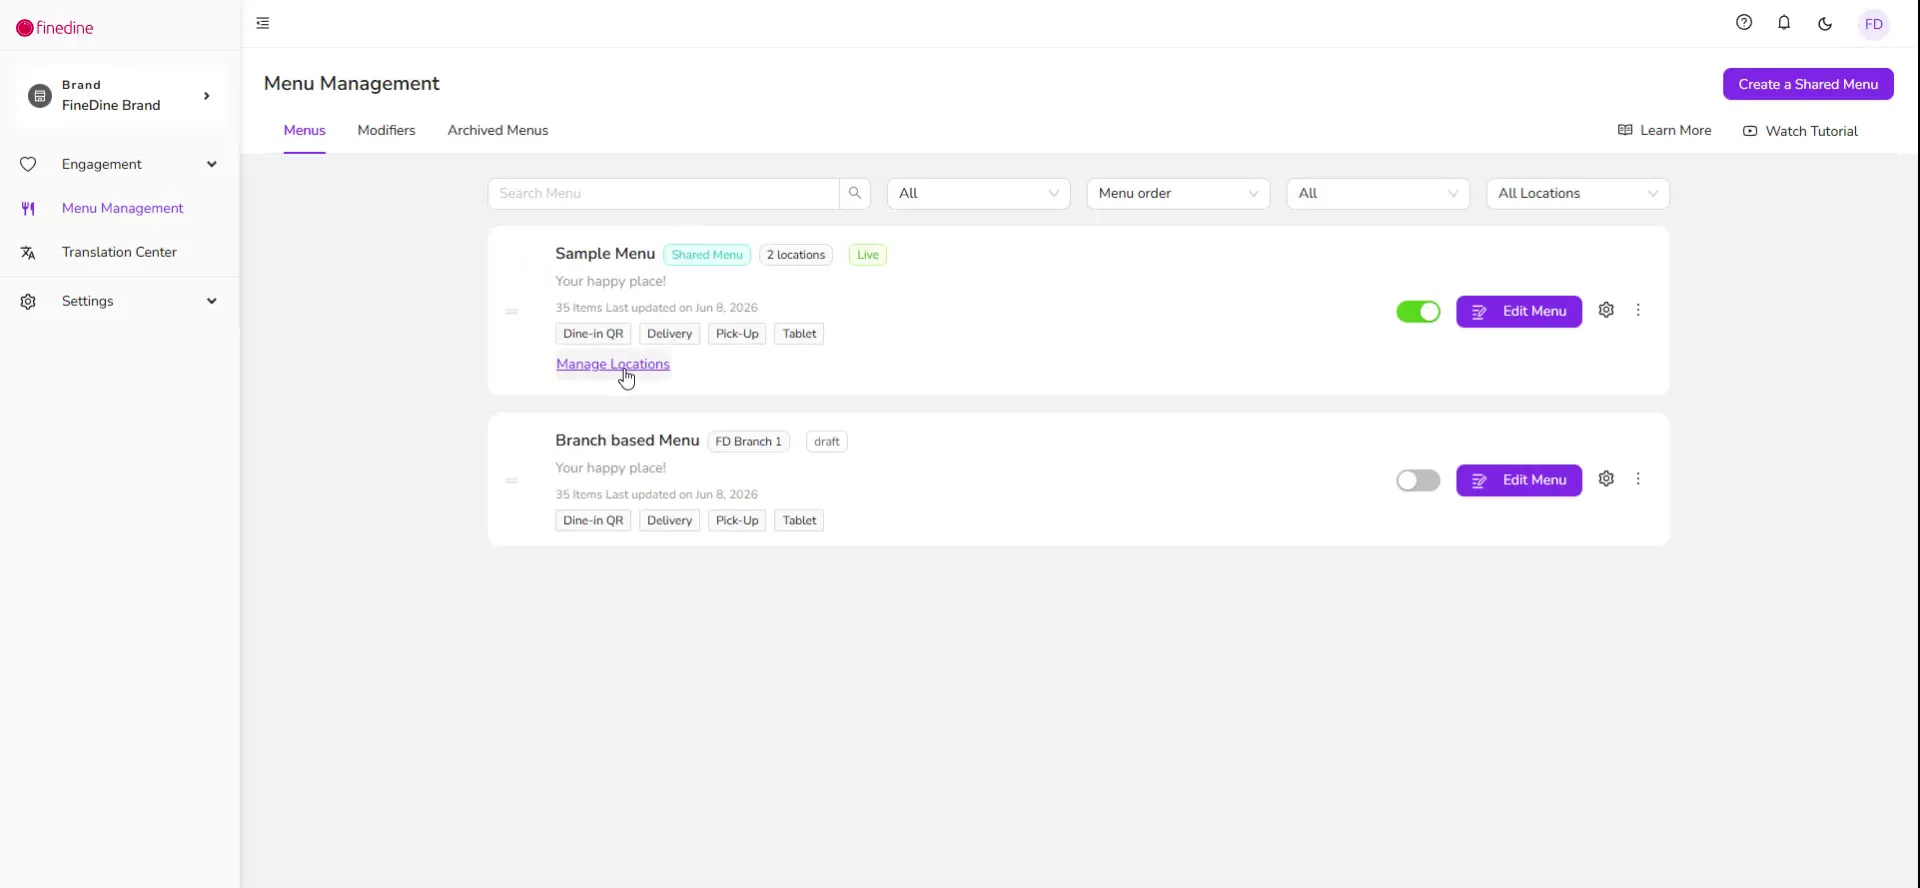
For example, you can click the location selector and share the menu across both (or all) of your locations.
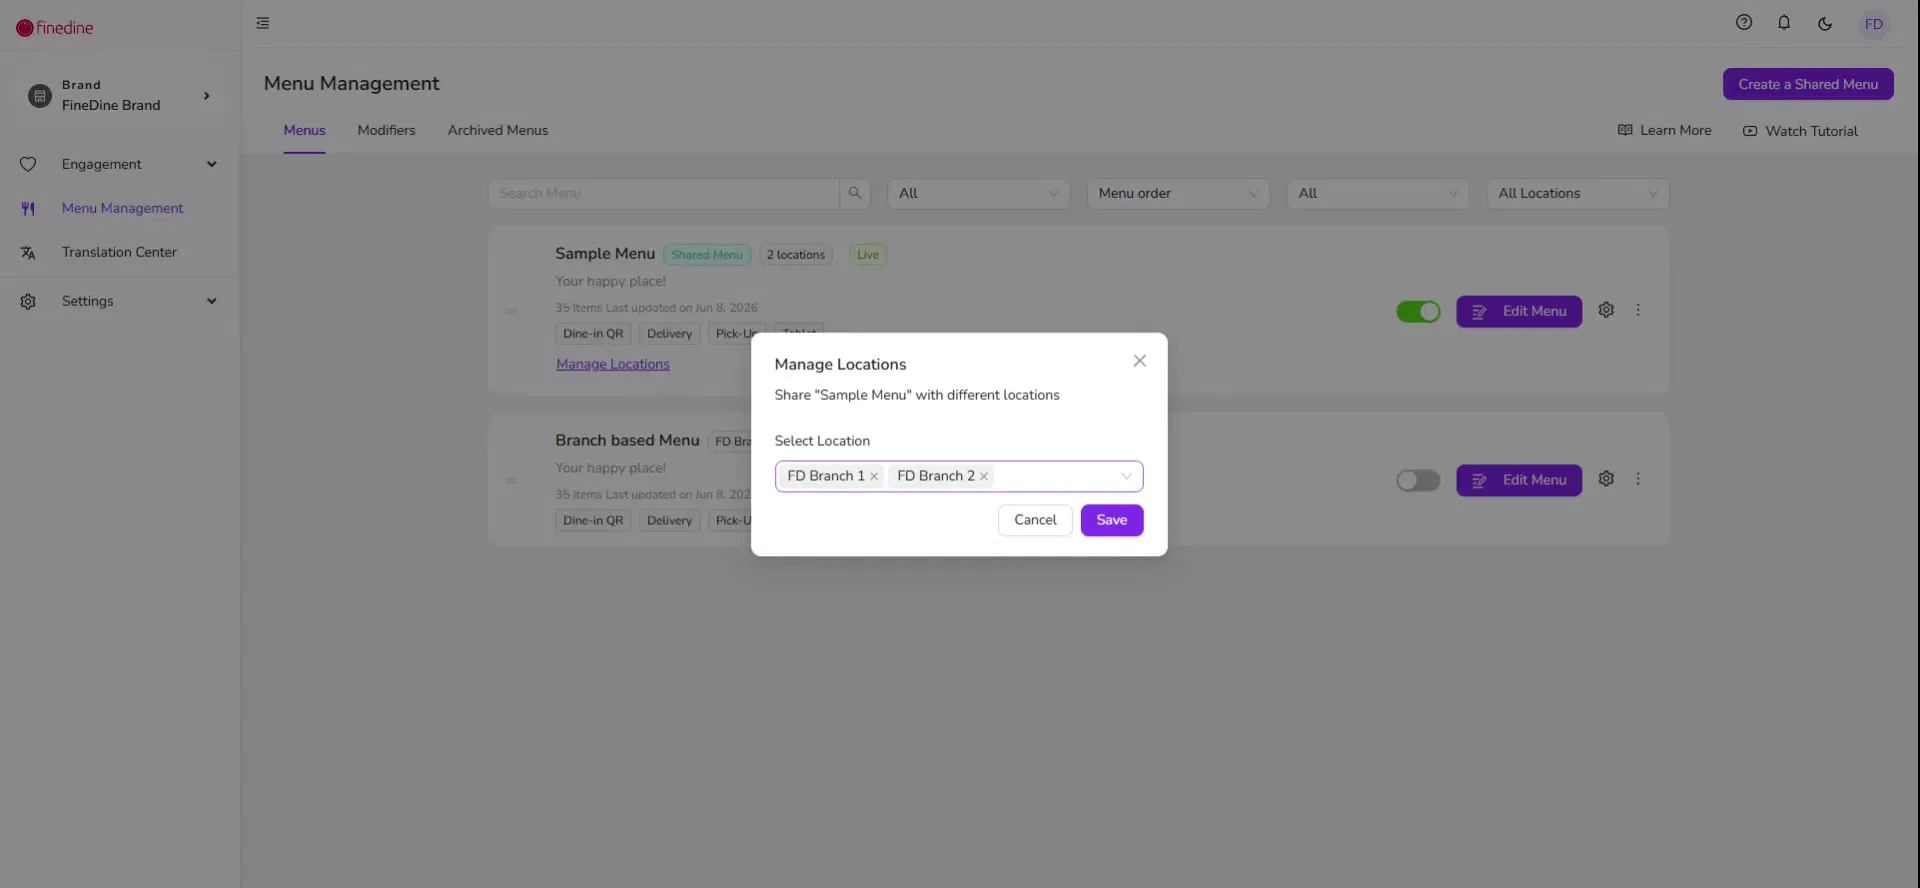
Once locations are selected, the shared menu will be active for all those branches.
Step 4: Enter the Menu and Configure Categories and Dishes
Now enter the shared menu to configure its structure and content.
Open the menu to add categories and all the dishes you want to include as part of your default shared menu.
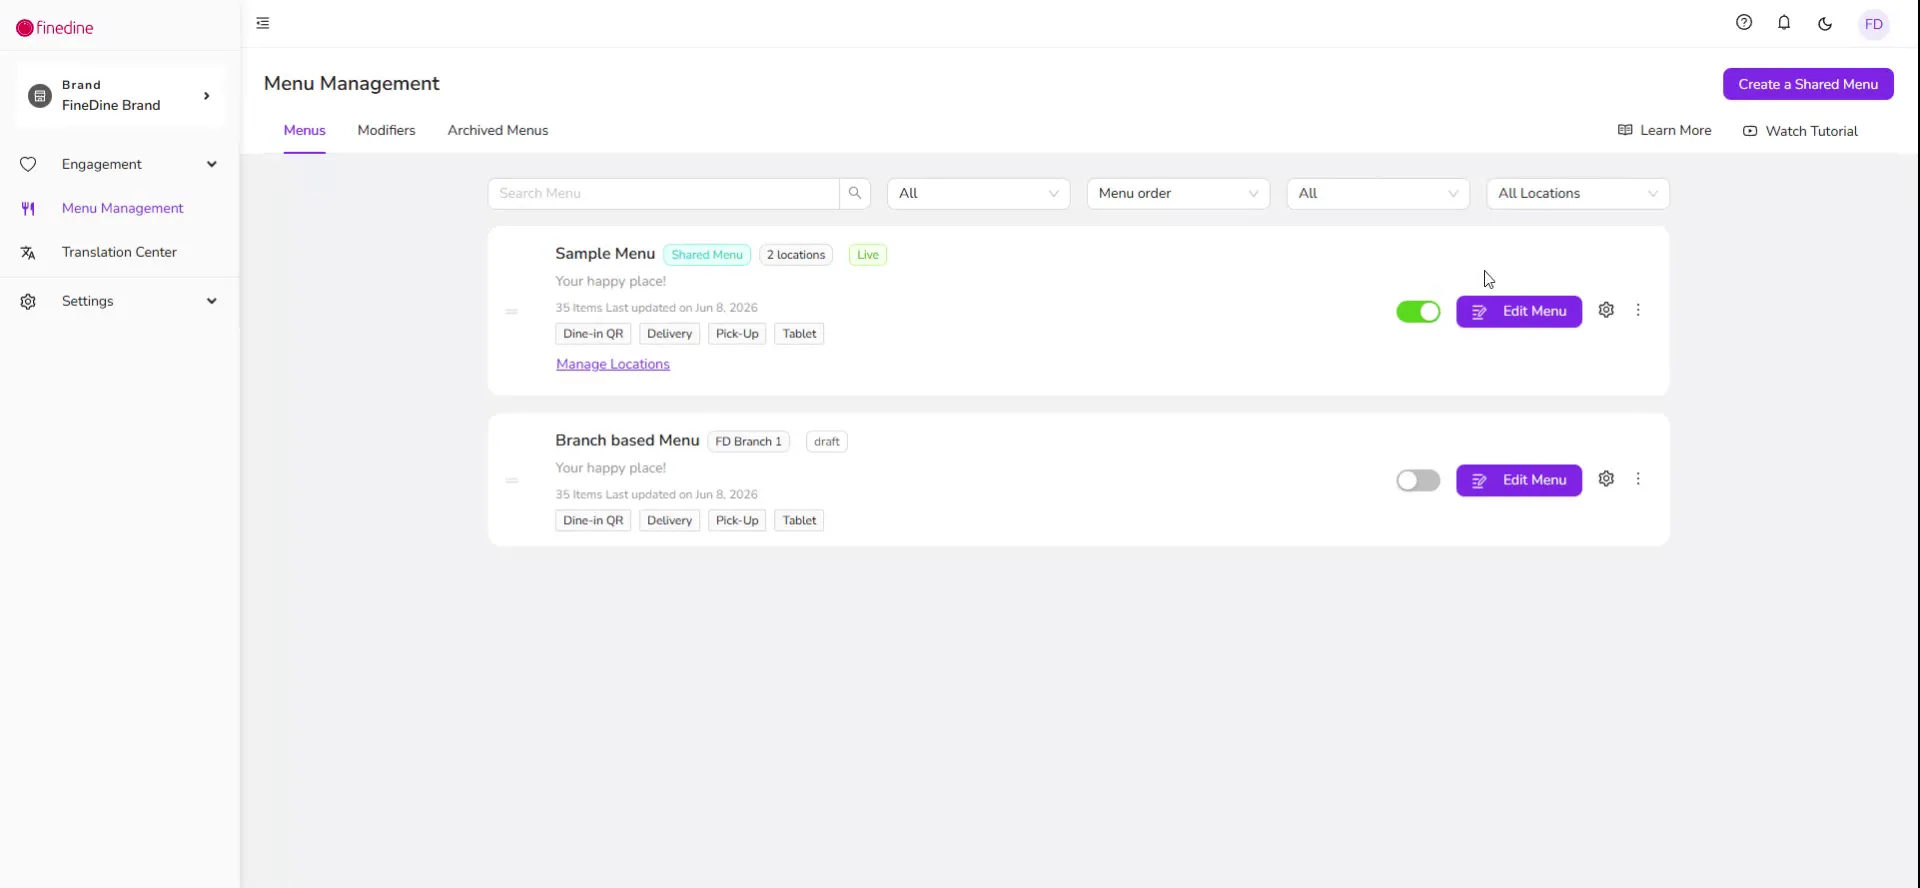
You can then configure item-level details, such as pricing and display options.
Step 5: Set Different Prices per Location (Price Overrides)
You can set different prices for different locations while still using the same shared menu.
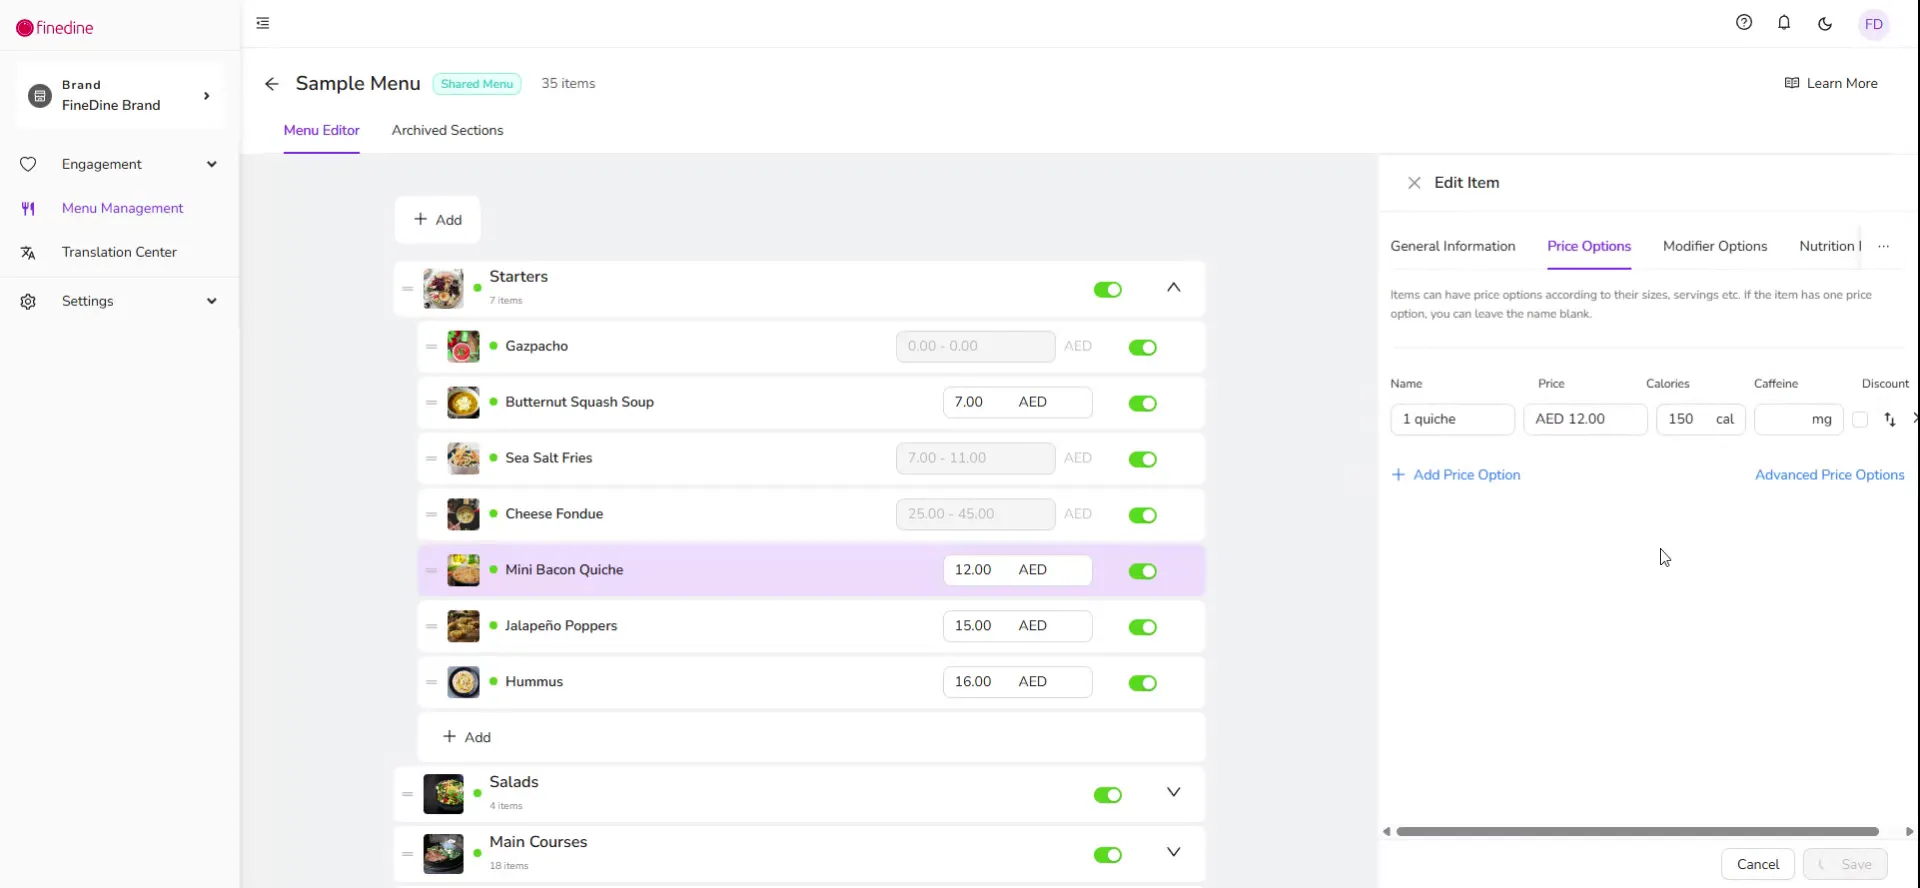
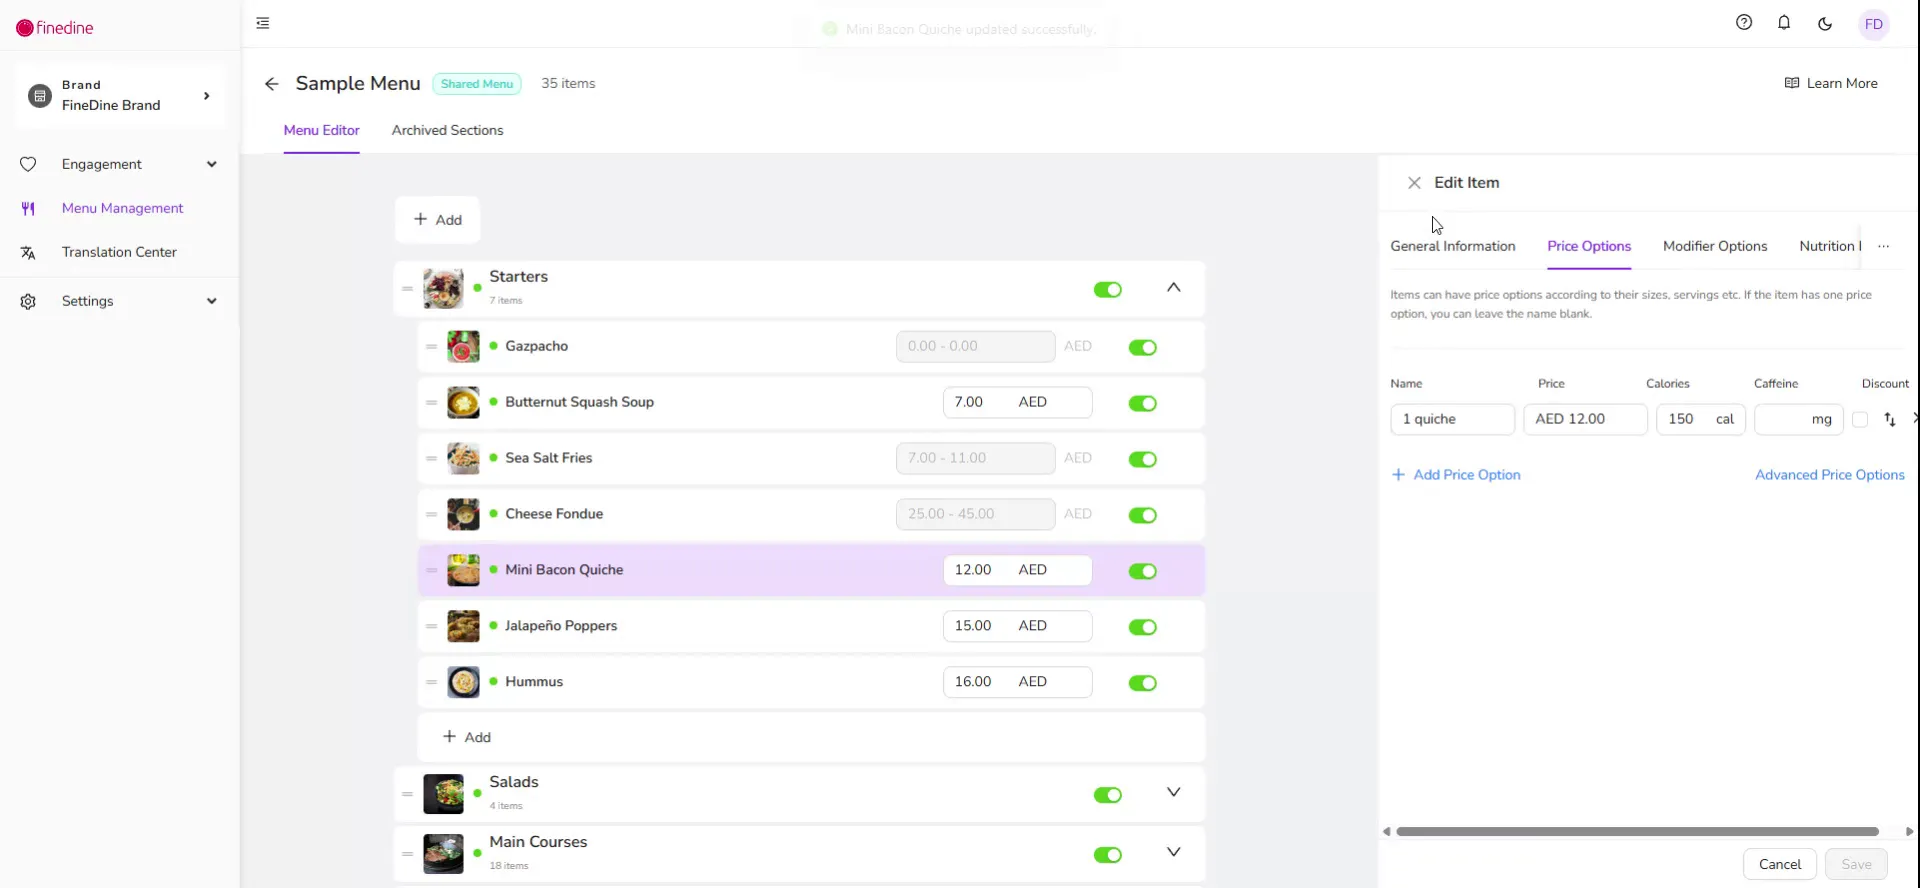
Start by clicking on any item in the menu, then go to the Price section.
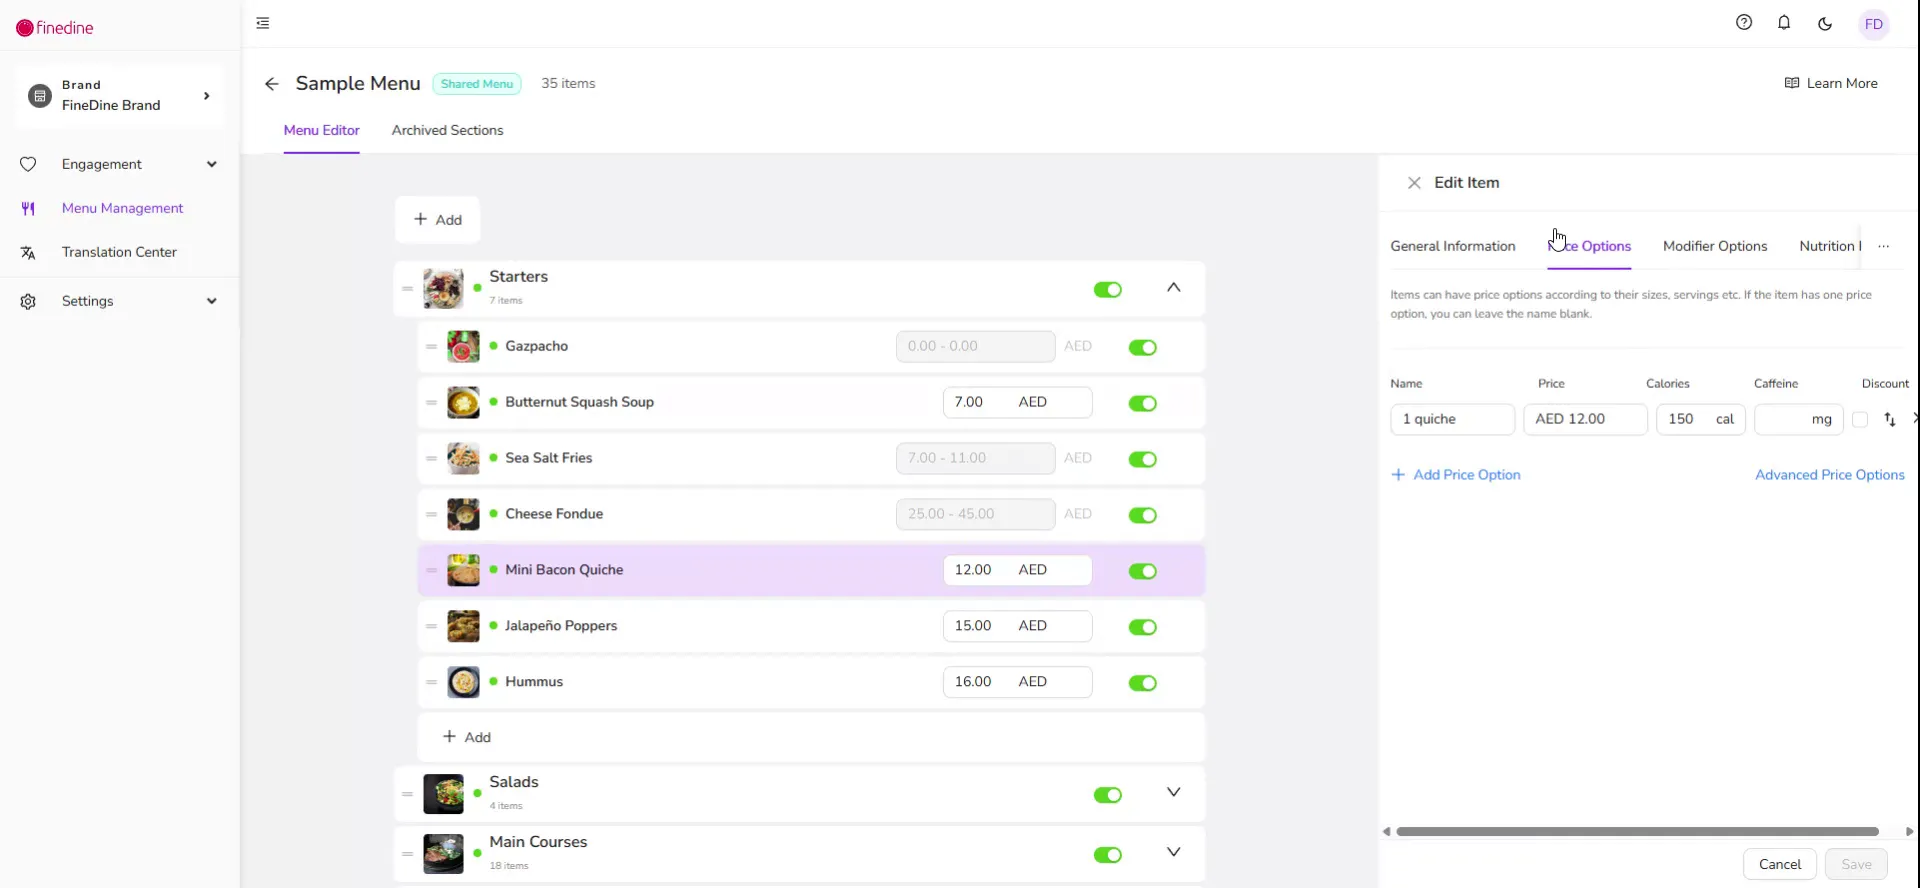
Click on the Advanced Price option to access location-based pricing.
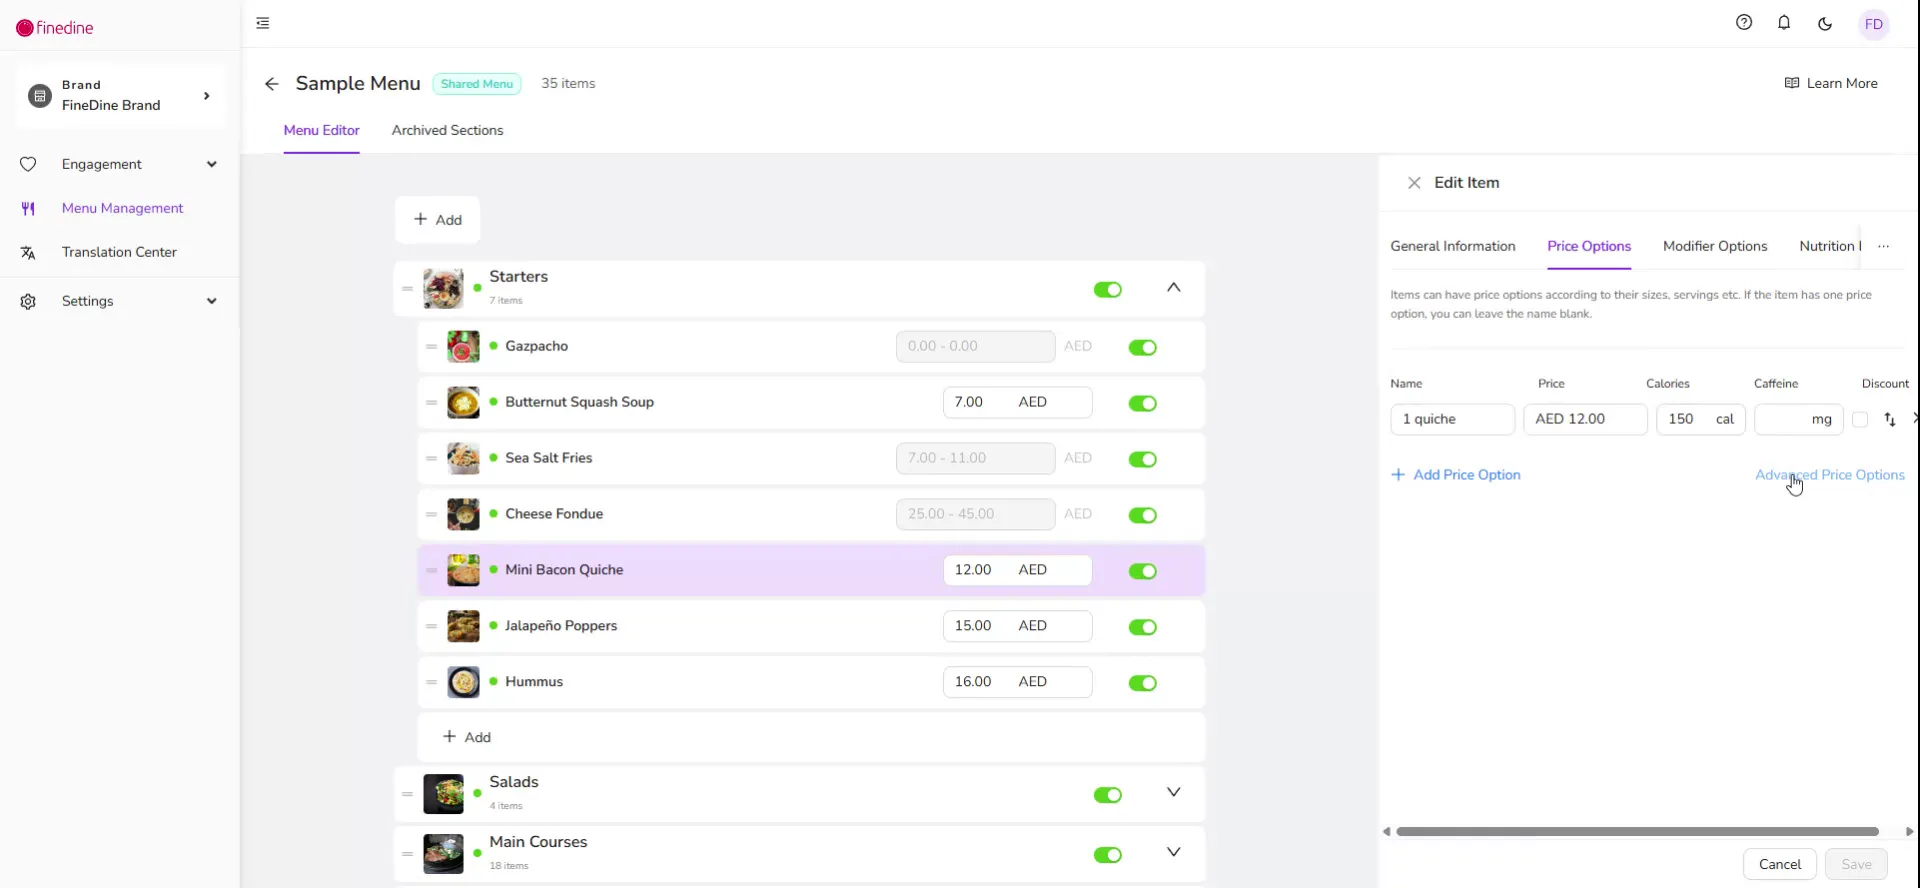
You will see the default price, which is shared across all locations.
To override the price for a specific location, click the Add Price Override button.
Enter the new price (for example, 10) and assign it to the desired branch (e.g., your second branch).
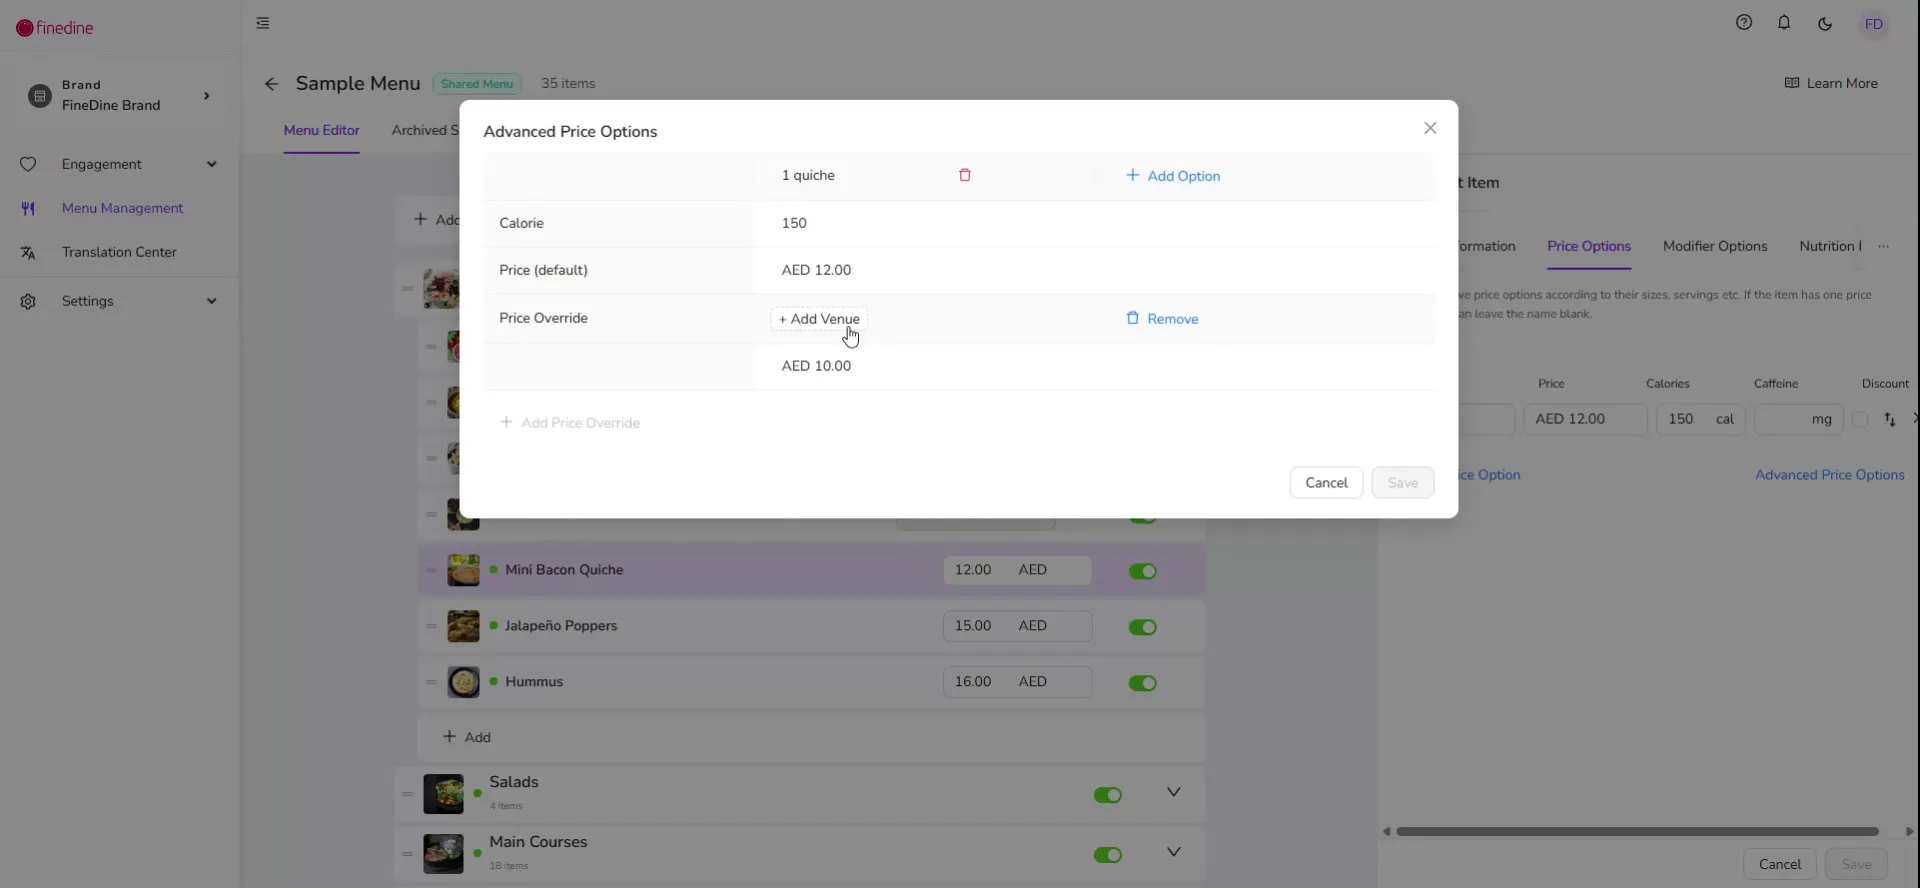
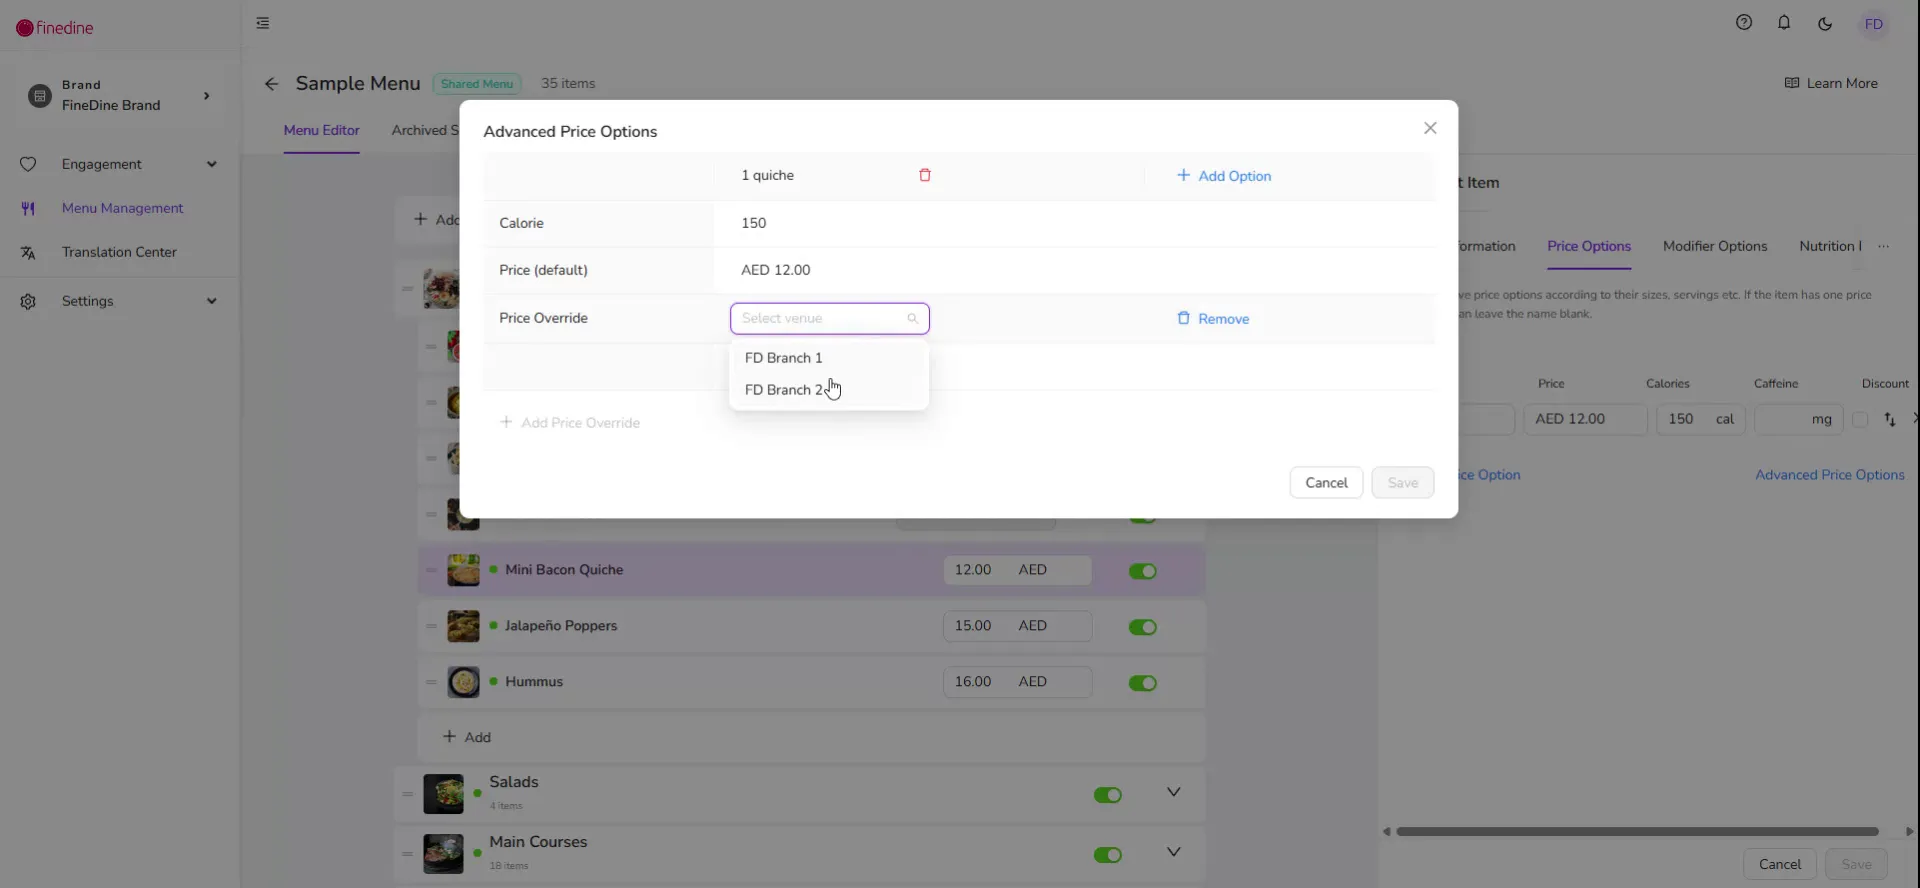
With this configuration, your first branch and all other branches will display the default price (e.g., 12), while only the second branch will show the overridden price (e.g., 10).
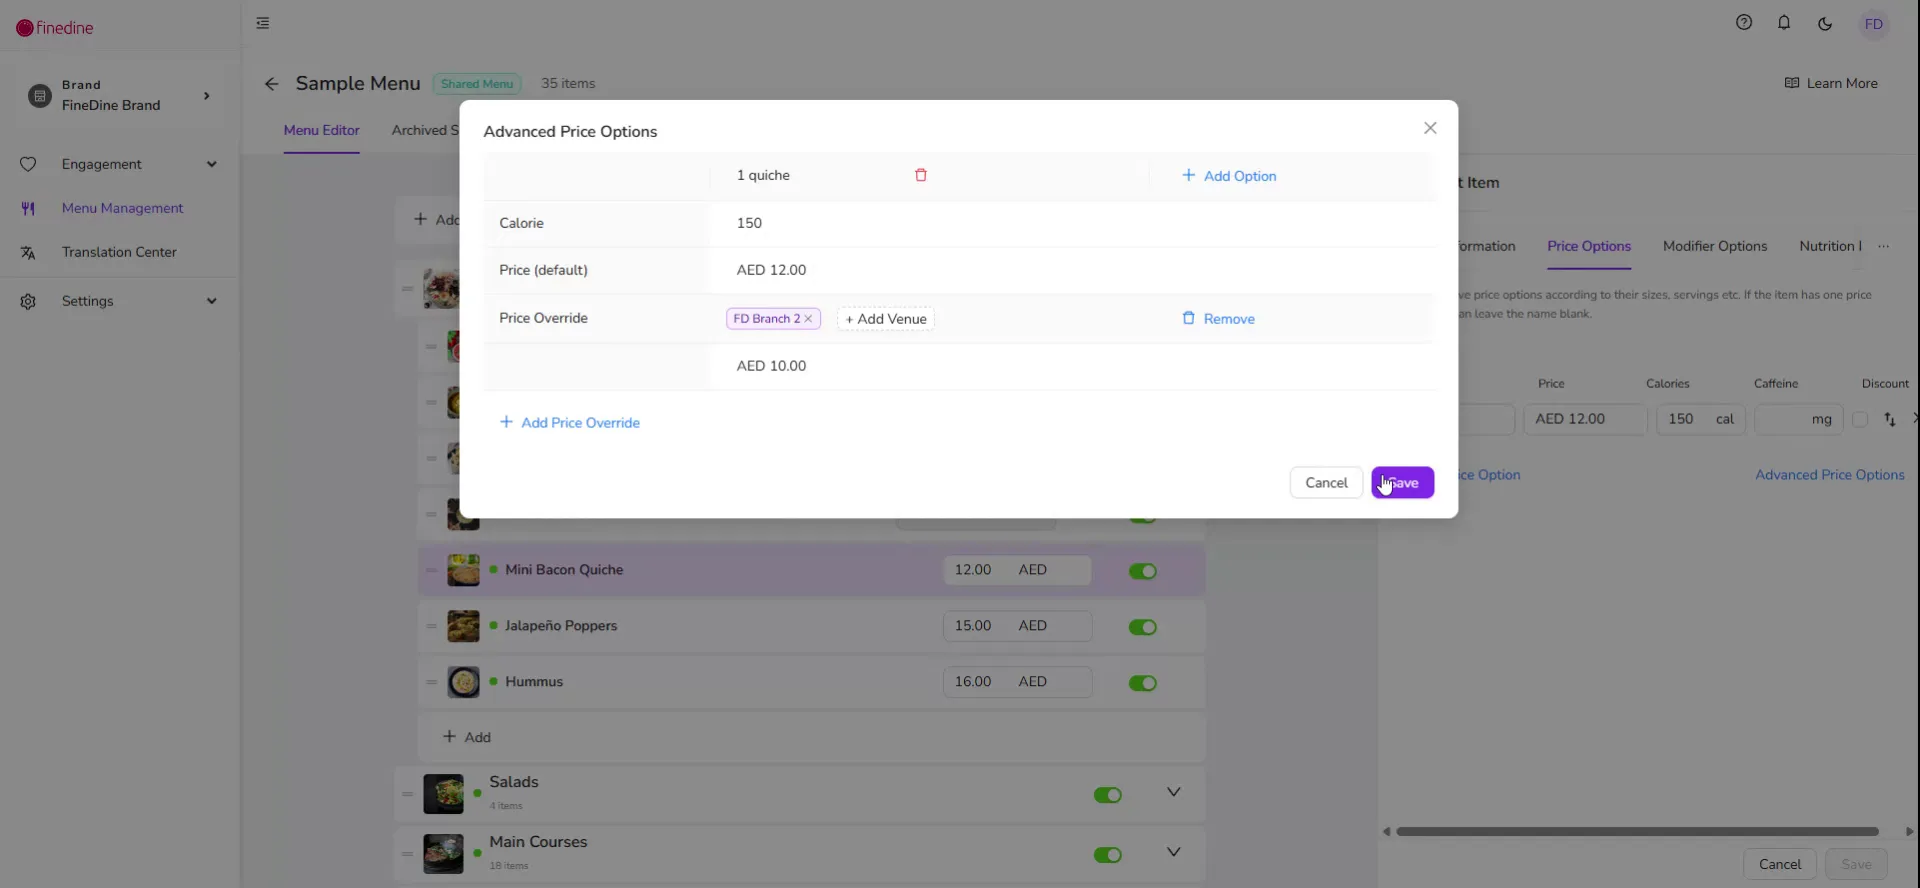
Click Save to apply and confirm the different price for that location.
Step 6: Manage Item Display per Location
You can also control where each item is displayed across your locations.
Go to the General Information section for the item, then click on Manage Display.
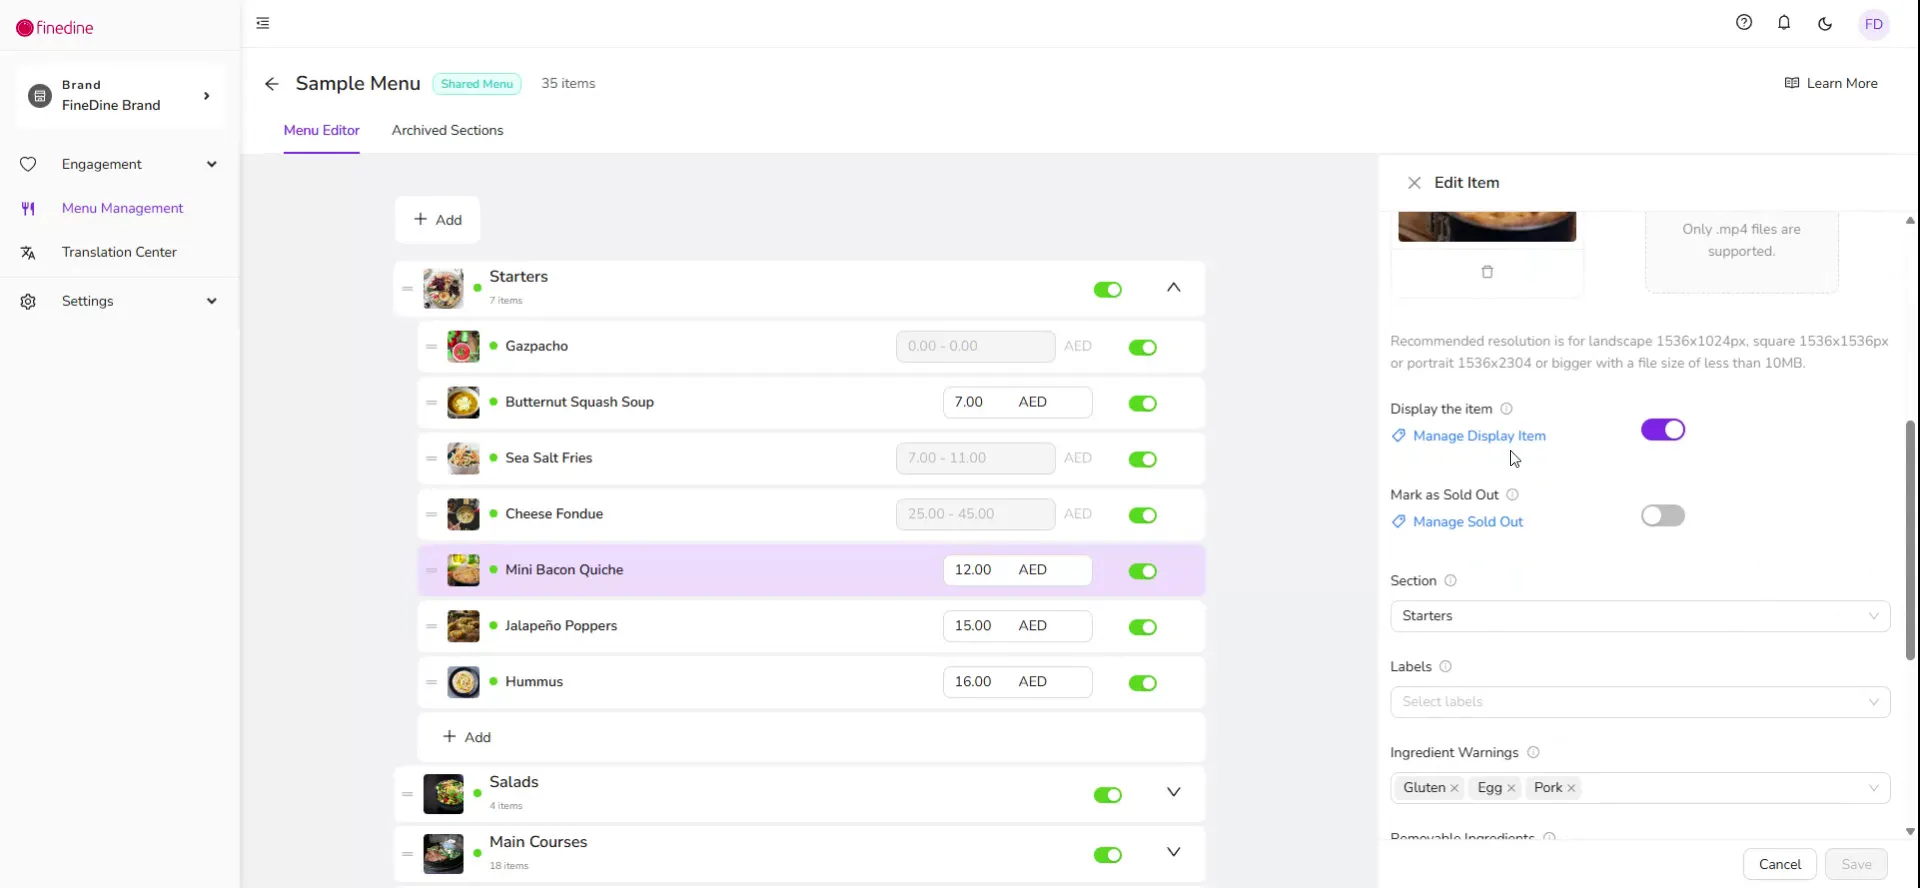
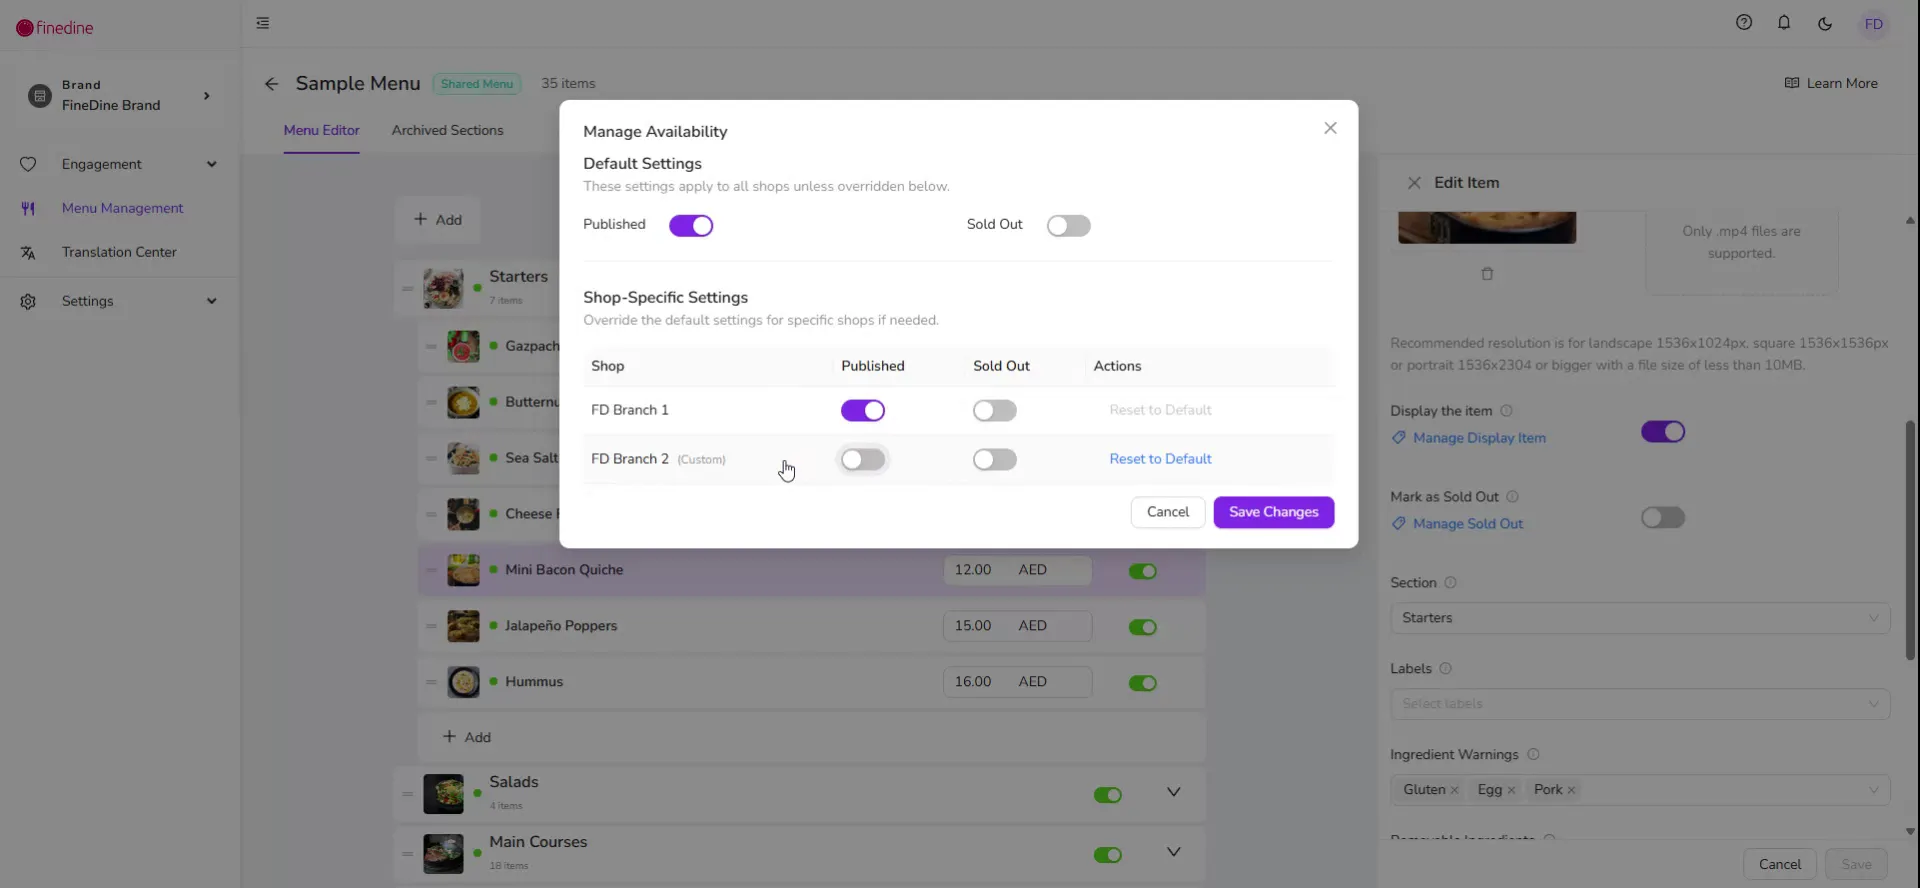
From here, you can decide on which branches the item should be visible.
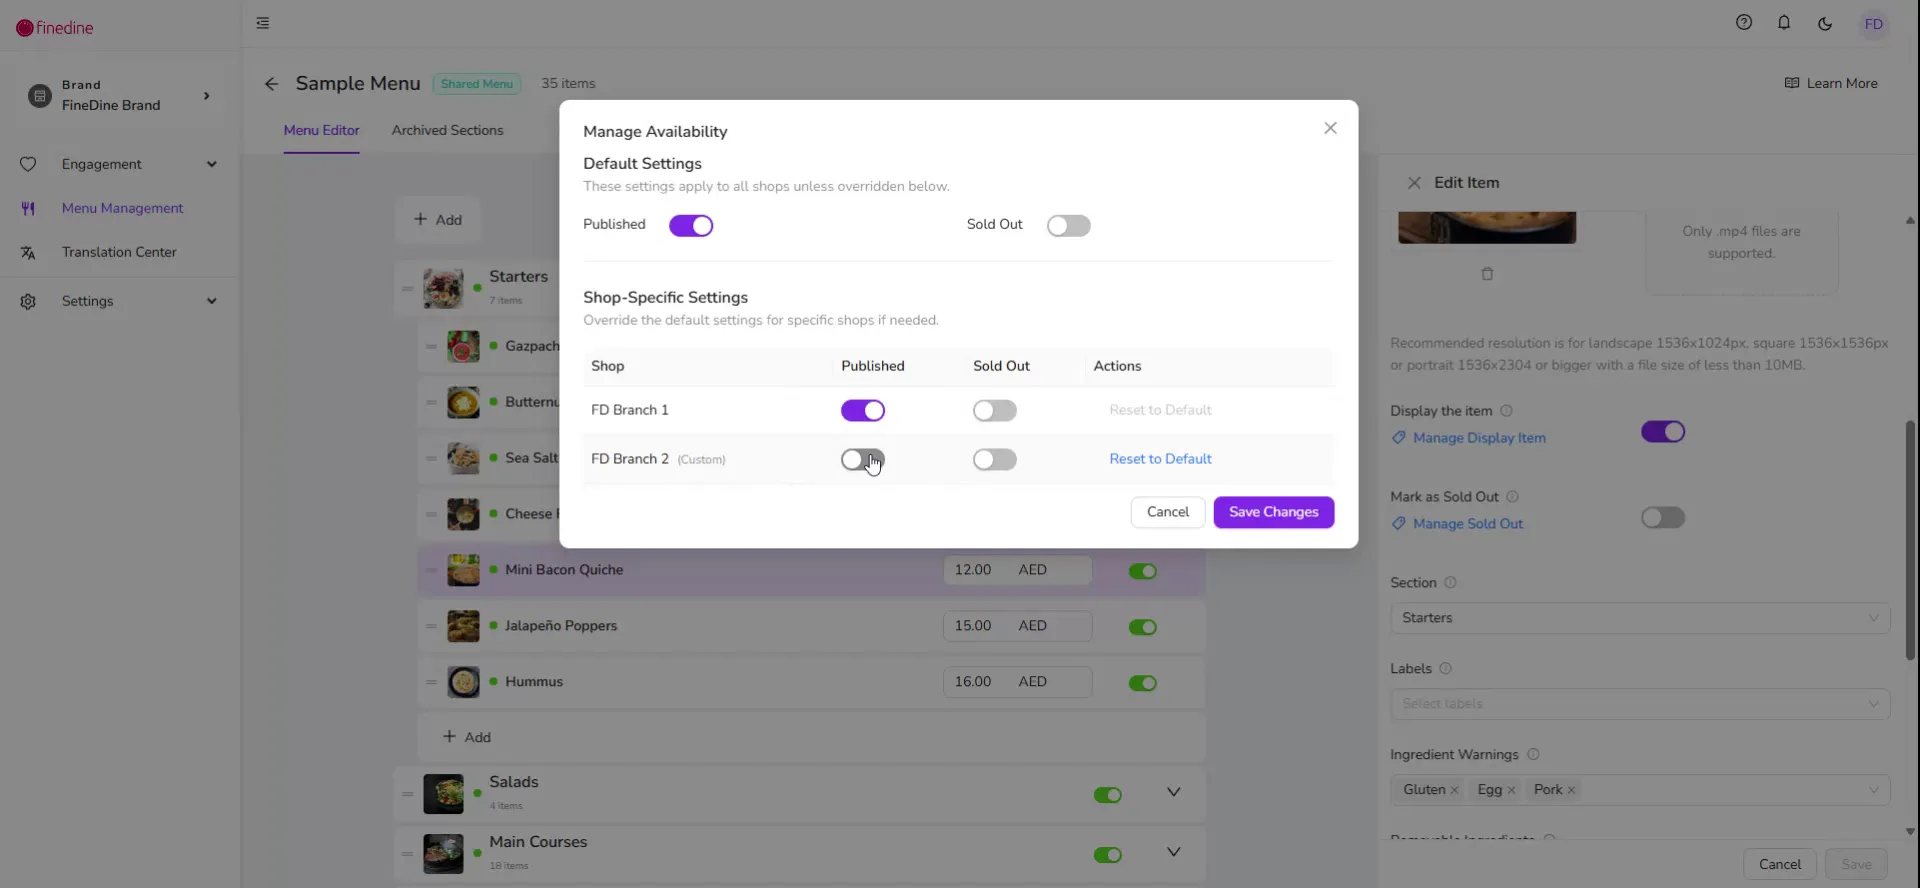
If you want to hide this item only from your second branch, click the Hide button for that specific branch.
If you want to disable the item completely across all locations, click the Unpublish button. This will remove the item from all menus in every branch.
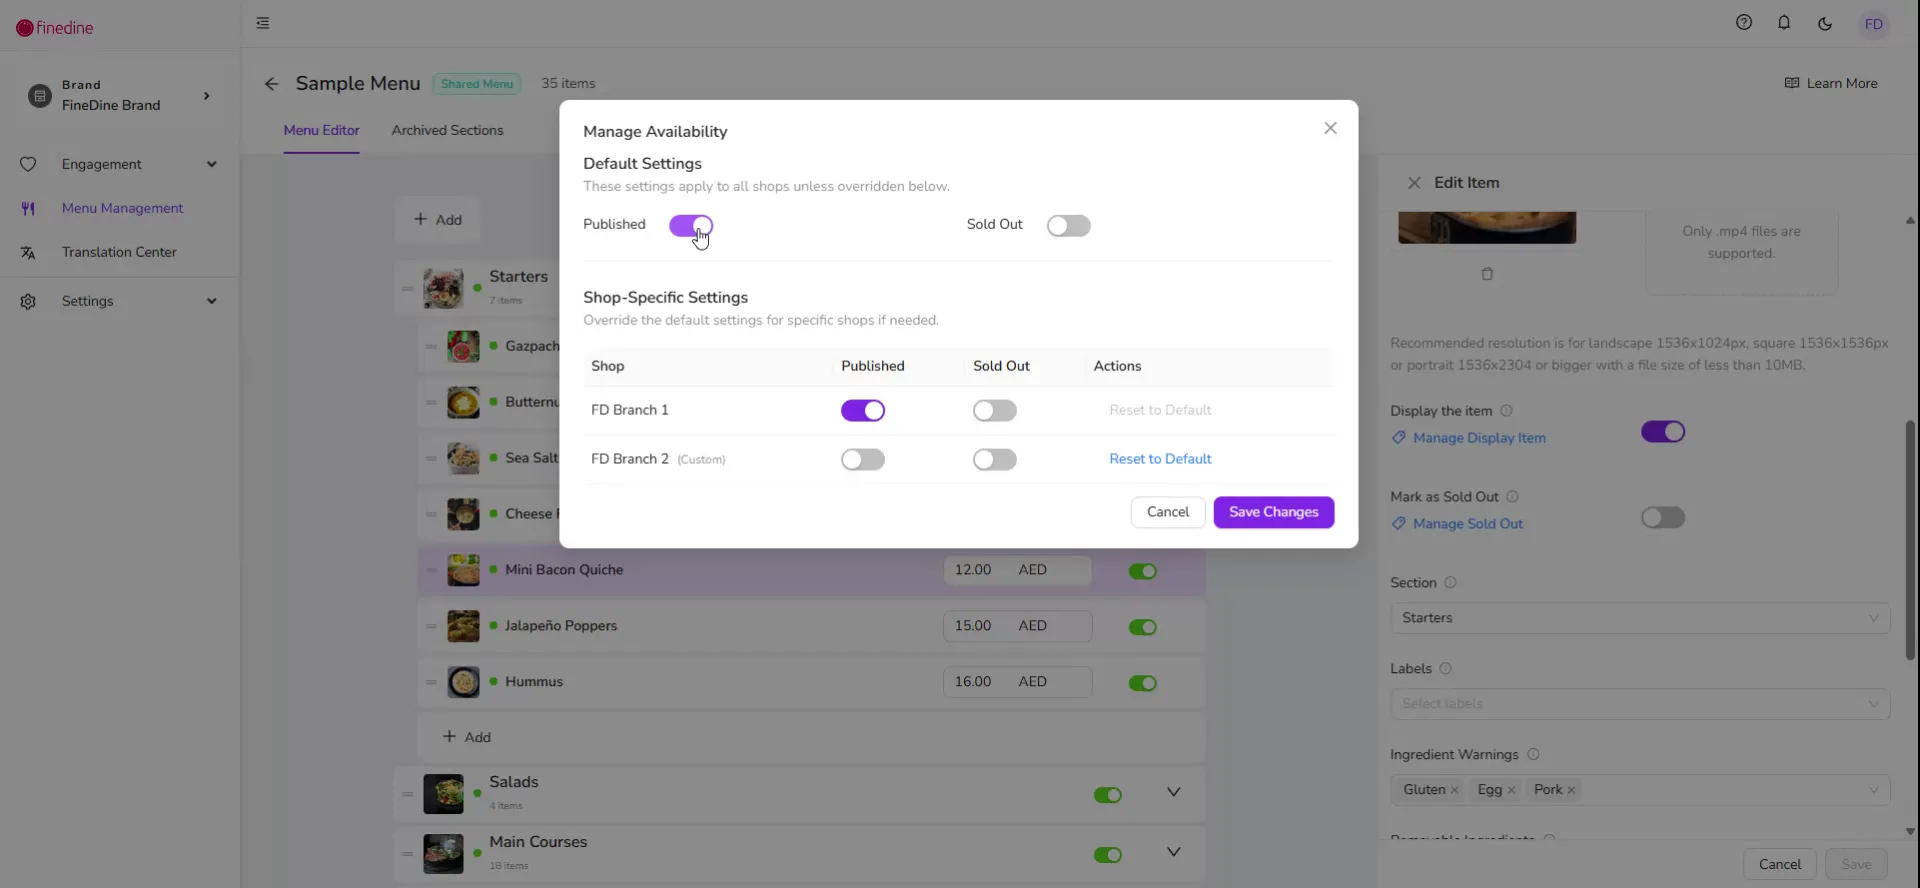
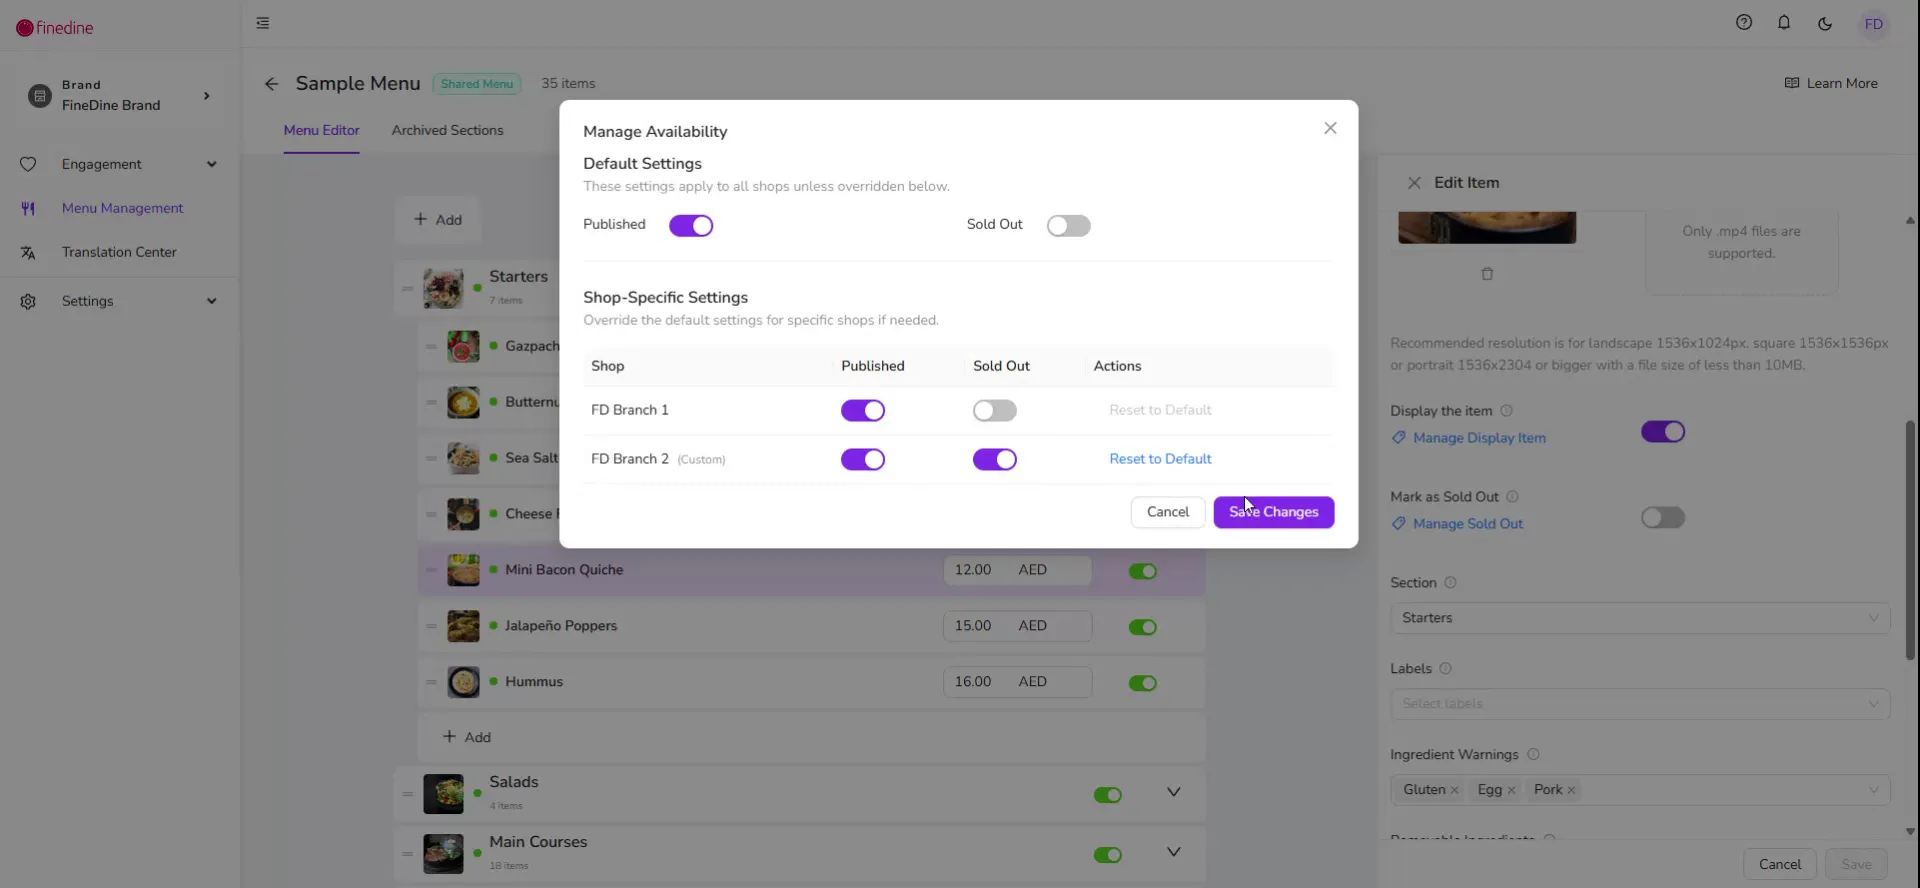
Step 7: Mark Items as Sold Out in Specific Locations
If the item should remain available in general but be temporarily unavailable at one branch, you can mark it as sold out for that branch.
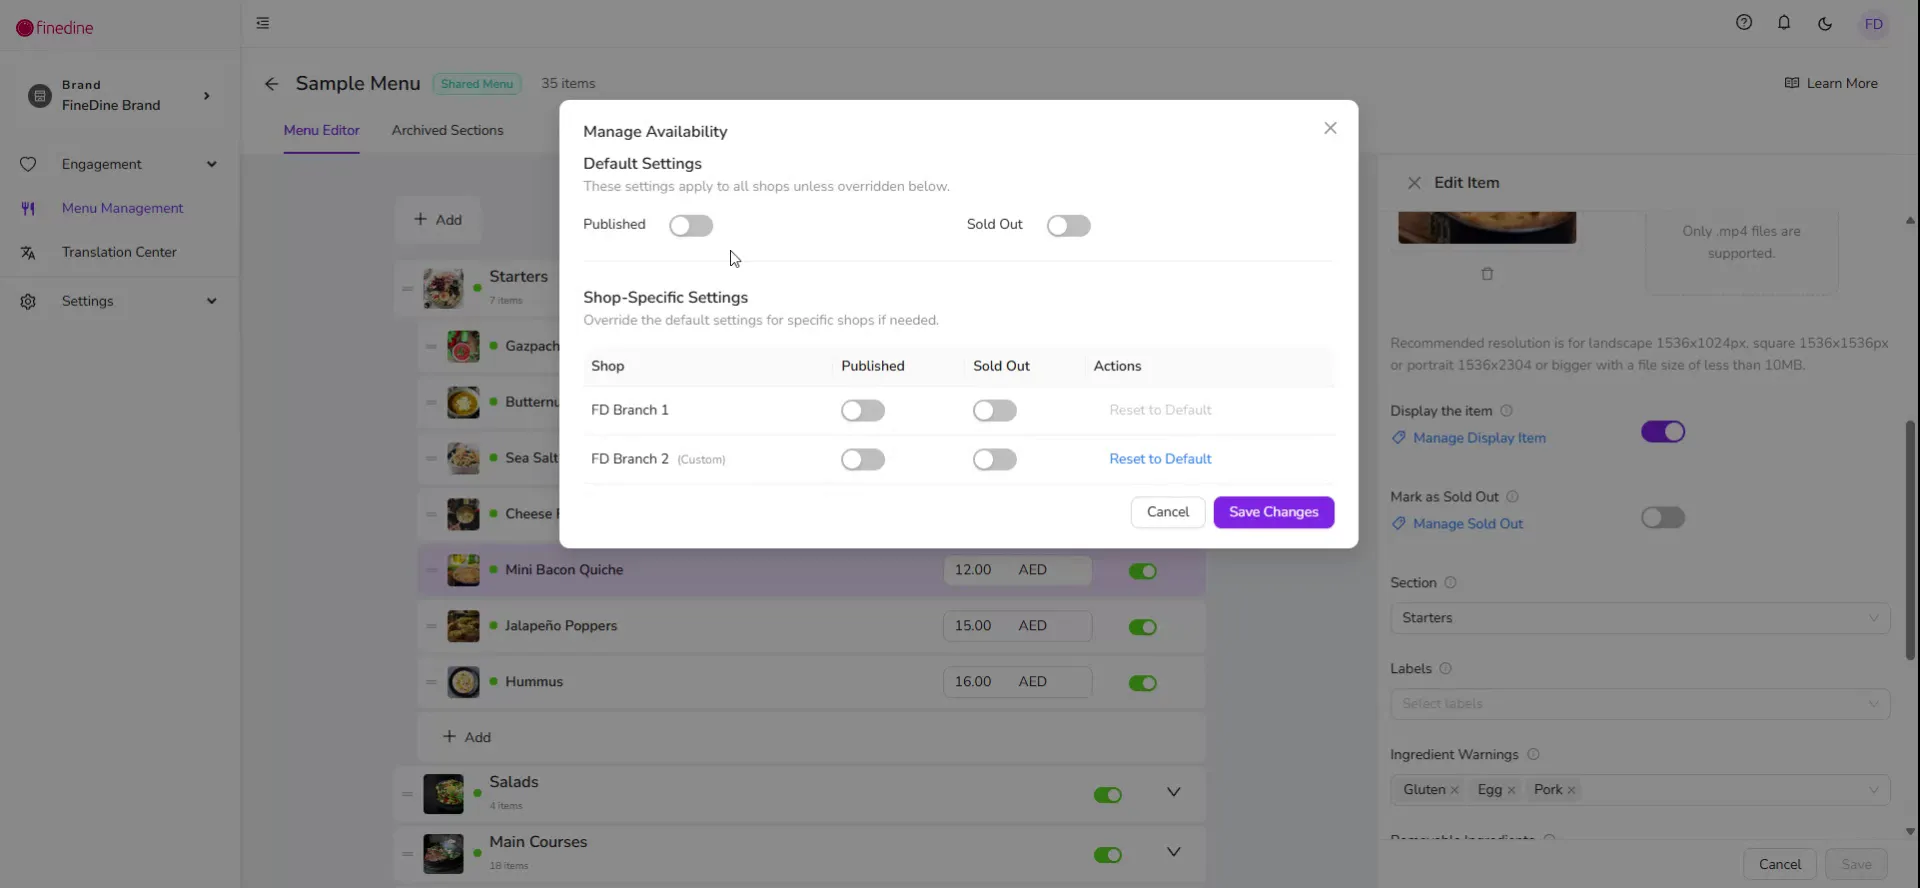
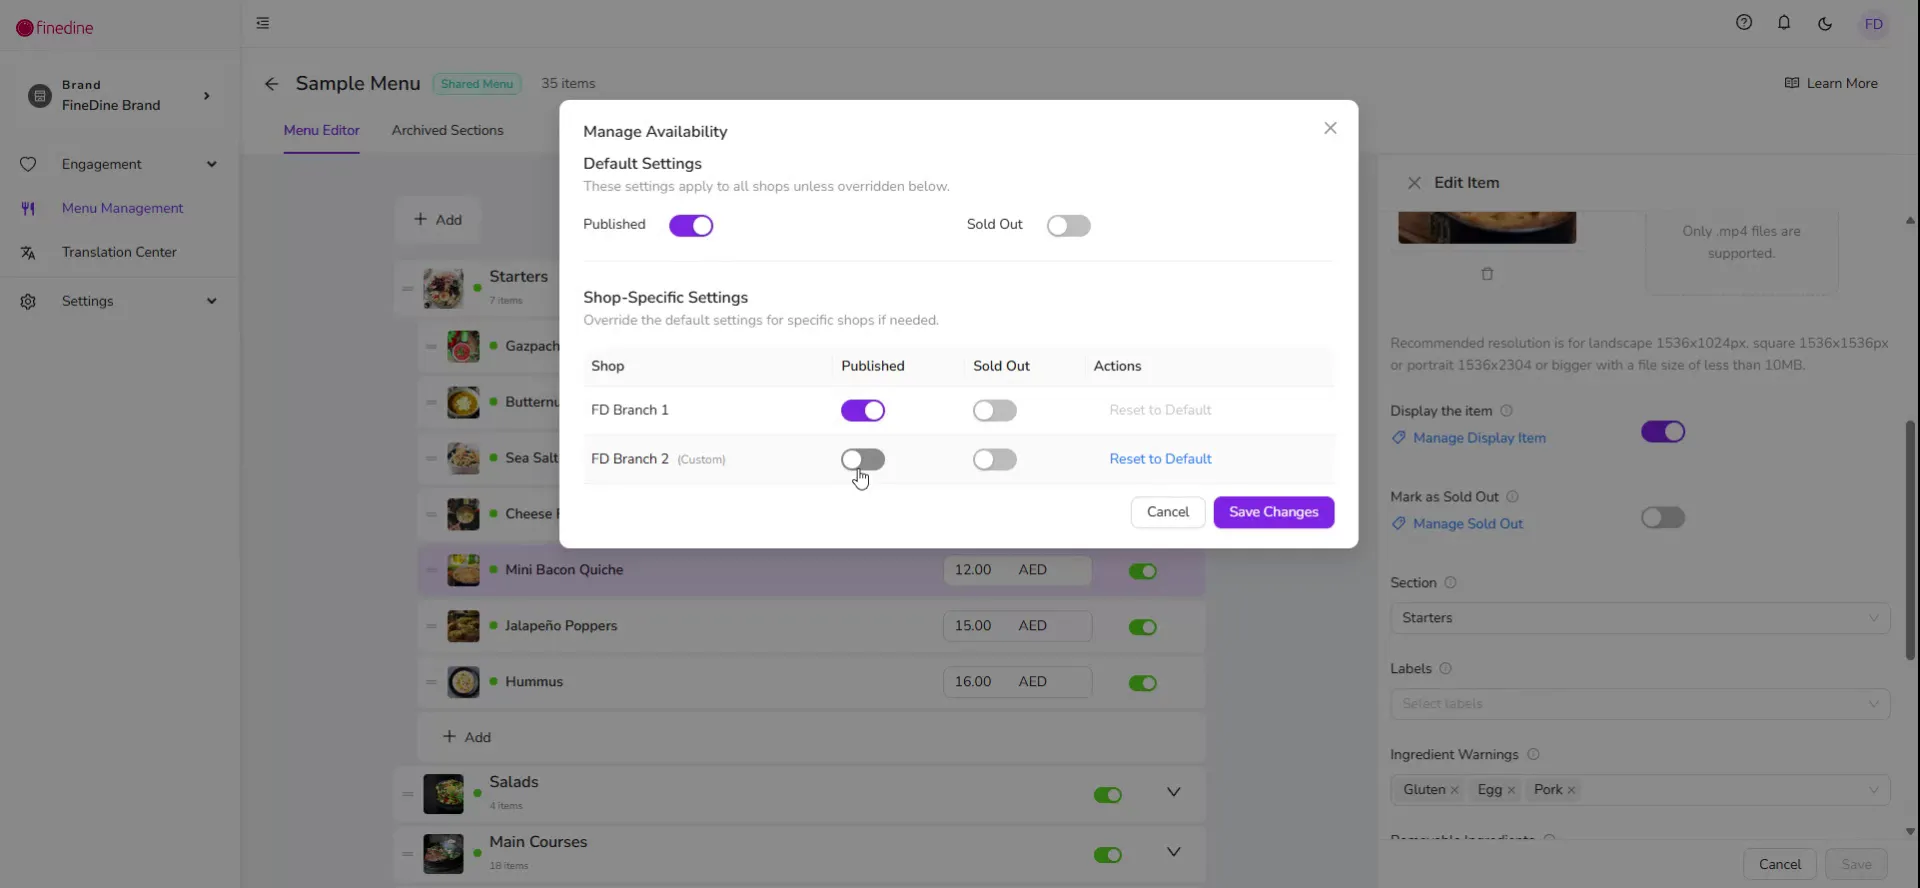
Setting an item as sold out in a branch keeps it visible to customers, but they will see that it is currently unavailable and must wait until it becomes available again before they can order it.
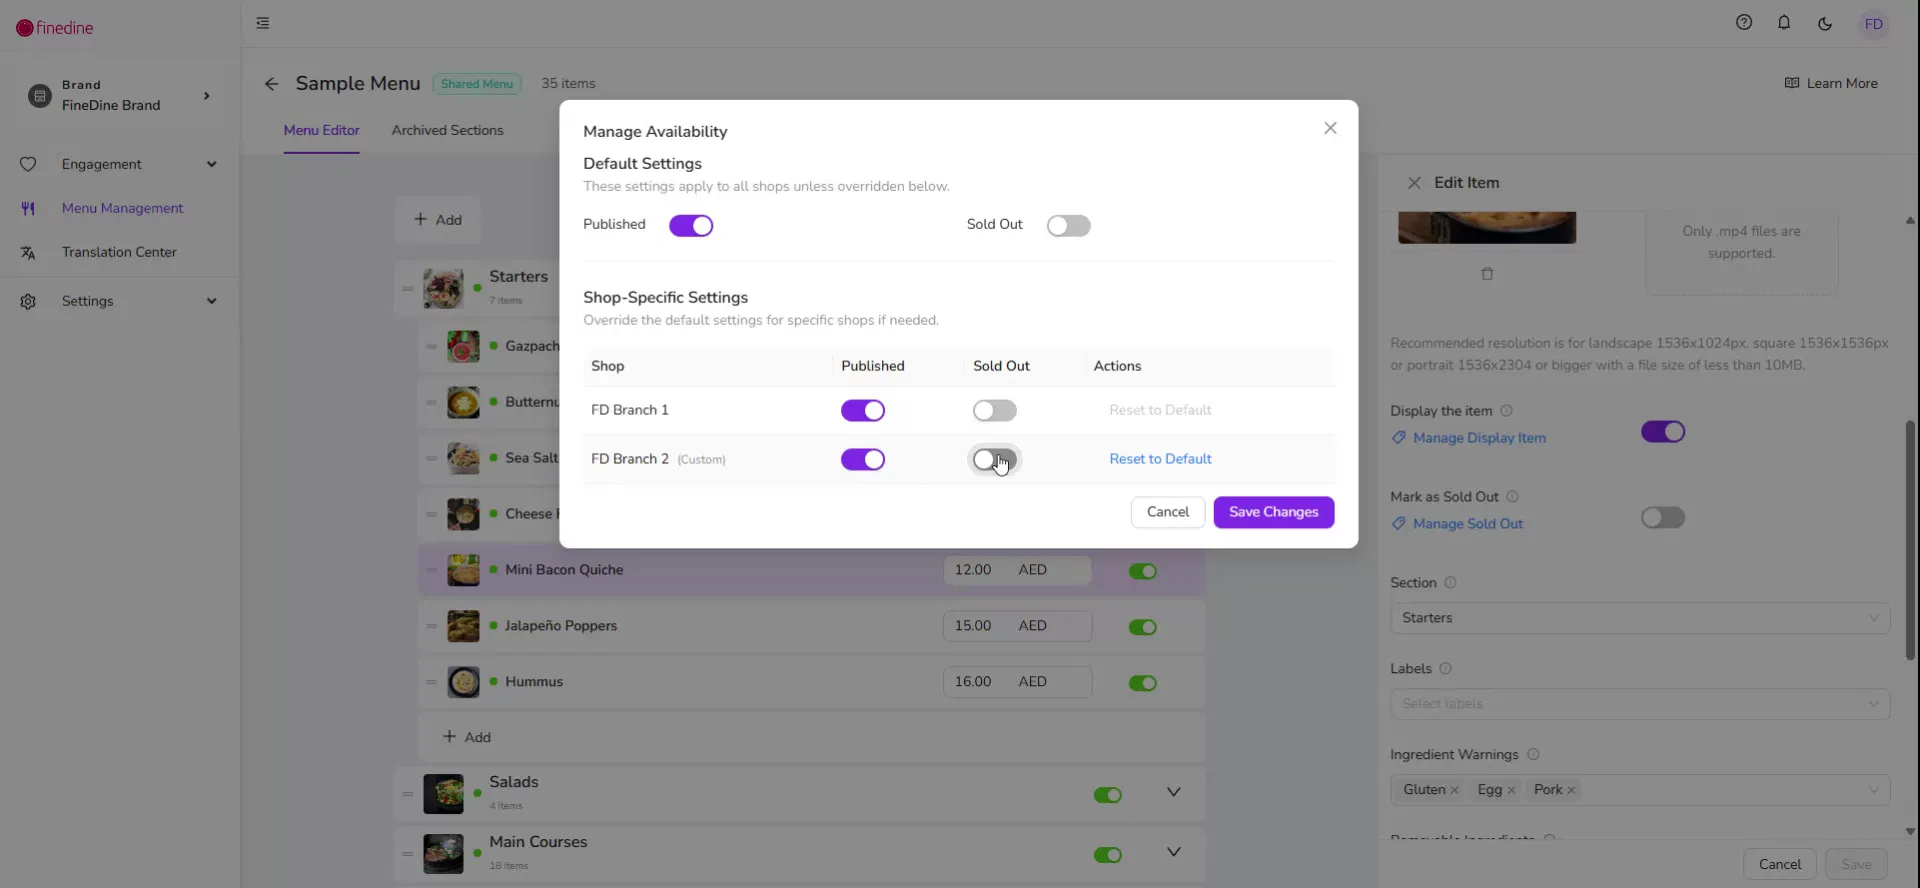
When you are done, you can exit the menu. For further assistance, you can reach out to FineDine support via live chat or explore other available training videos.
Was this article helpful?
Related articles
- How does the system work?
- FineDine Solutions (Cost & Products)What are the prices and payment methods? What is included in a subscription? Is it a one-time payment?
- What is Included in the Free Trial?Which features are available on the trial period
- How to Change the Dashboard's Language?A brief description to change the Dashboard language
Still need help?
Our support team is here for you. Start a chat and we'll get you an answer.